Tattoo

King of Hearts Puppet


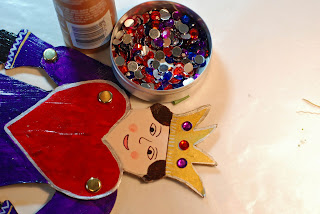
Here is a 'King of Hearts' jumping jack puppet I have been designing for Kindergarten. A little complicated for a group of 5 yr olds but I think fine with small groups. I was also working on a 'Queen of Hearts' puppet but the jumping jack motion seemed a little unlady like......still figuring that out.
I think I'll convert it to a big Valentine Heart Man puppet...stay tuned for that one.
If you want to give this a go here is the directions:
Materials Required:
- thin cardboard (like from a ceral box)
- paper fasteners, mine are a little large..I think you can get a size smaller
- paint, markers, crayons, whatever medium you want to add color
- Mod Podge (optional), for a shiny longlasting finish
- string
- large bead
- embellishements (optional)
- hole punch
Print off template onto cartidge paper or even cardstock.
Cut out pieces and glue to thin cardboard. I usually trace onto the cardboard using the printed pattern piece as a template, cut it out, and then glue the two pieces together. You don't have to use the card but it will be more durable with it.
Add color with medium of your choice.
Punch holes where indicated...for the small holes I used an awl but you can use a large needle.


Add detail to your puppet. I used some metallic paint .


Add a coat or two of Mod Podge to get that shiny finish and to make your puppet more durable.
I also added a coat on the back.
Let dry.


Taking your paper fasteners put puppet together.
For the moving parts do not fasten too tightly. You want there to be ease of movement.


Now to string your puppet. I used two different gauges of string. Attach small pieces of string to all the small holes securing with a knot. You will have to use a needle or awl for this.
I used crochet cotton for this as it was thin enough to thread my needle.


Take a long piece of heavier string for your main pull. About 20" or so. Place the arms and legs at rest before you tie..this is important!
Tie to the main pull, make sure there is about 2 inches of slack in the strings that are attached to the arms and legs. Try to get the slack to be equal between the 2 arms and the 2 legs.


It should look something like this.


If your arms aren't moving well you may have to seperate the strings onto 2 pulls like this.

If your puppet isn't moving well consider these:
...... joints are too tight so loosen fasteners
...... not enough slack in the smaller strings attached to arms and legs
..... need to seperate arm attachments by using two pulls.
.... slack between the arms and legs is not equal on both sides


I added a wood bead at the bottom for a pull.


I also decided to add some bling to the crown.


Finally make a hole at the top with your awl or neeedle to attach a loop for hanging.

There you go a dancing 'King of Hearts'
Have fun!

see you next time
gail

Grade 3 Chinese Dragons


As promised here are the Chinese Dragon Puppets done by Grade 3.


I think they did an awesome job!


Well done Grade 3!

gail

Valentine Collage


Here is a Valentine Collage project that I did with grade 1 and 2 last year.


I was teaching them different painting techniques which we then turned into our collage. The leftover paper was then used to decorate their Valentine Mail Pockets. (essentially a big heart shaped envelope made from white posterboard)


Materials Required:


- white paper, can also use white fingerpaint paper
- black paper
- paint in valentine colors
- paintbrush
- bubble wrap
- old comb (you can also use cardboard cut like a comb for the same effect)
- splatter box
- gluestick
- pastels
- scissors


Paper #1 Bubblewrap Print


Take some bubblewrap and cut into squares suitable for small hands. Place some paint onto a plate. You can use liquid tempera or acrylic...whatever you have on hand....if using cake tempera, moisten the colors you want.


Take your bubble wrap, place into paint bubble side down and print onto the paper.


Paper #2 Combed


Paint your paper with paint. Fingerpaint paper works really well for this method. You want it to be fairly wet and thickly coated.


You can also mix some flour into your paint to get a thicker consistency just make sure you are using a heavy paper for this.


Before it dries take your comb and comb some patterns thru the paint. I just buy a few extra picks from the dollar store to have on hand. Picks seem to work the best due to the handle.


Paper #3 Splatter

Kids always love this technique. To minimize the mess have a splatter box...just a fair sized cardboard box with tall sides. If you can do this outside as well or just make sure you have a dropcloth set out around the box.


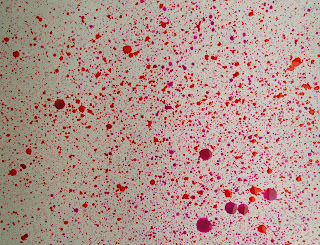
Take fairly thin paint and fling it on the paper with a paint brush, (see photos in this past post).


Use valentine colors and splatter quite extensively.


Let all the papers dry.


Cut a vase shape out of one of your papers and then start cutting hearts. Big ones, small ones, cut out ones. Place on your black paper to help figure out your design.


When happy with your design start gluing down with a glue stick. Now some kids may want to draw their stems out first before gluing....the only issue with that is to get them vary the stem sizes and lengths. You'd be surprised how many want to line them up like soldiers in perfect formation. Unfortunately that doesn't make a great bouquet.


Add stems and leaves. We used oil pastels as they show up the best on black paper. With older kids you may want to continue with the paper collage and have them cut stems and leaves out of green paper.

That's it. I am currently working on more valentine projects and hope to post them soon. As well we are almost finished our paper mache penguins. They have turned out better than expected and will be put on display in the school library. I hope to have pictures next week.

The Chinese Dragons turned out great and Grade 3 staged a Dragon Dance parade on Monday. I planned on posting a few pictures but they were so fast they all are a blur. I'll try to get some photos of the dragon puppets tomorrow.

see you next time

gail

January Virtual Sketch Date


Here is my entry for the January Virtual Sketch date. I overworked this way too much to my liking but my husband could still recognize that it was an orange so that's good.

How to Make a Diorama Valentine's Card


These are really neat. I don't think the photo gives them justice. It's hard to show you the 3-D look of these.

They are mini diorama valentine scenes that fold up as a card. Once you get the hang of them they are very easy to make and your kids will love to try one. Please click on any picture to see larger.
Materials Required:
- 3 pieces of heavy paper (I used watercolor paper) measuring 10x6.5", 9x4.5" and
one little scrap piece
- a lighter piece of paper measuring 17.5 x 7" ( I used a paper bag )
- piece of colored cardstock
- glue stick
- scissors
- paint, pencil crayons, or markers
- glitter glue
click on to see larger
Take your 10 x 6.5 piece of paper. This is your background. Sketch out a quick landscape. I was trying to make something a bit whimsical.
Add color with whatever medium you wish. I'm using watercolor.
Now take your 9x4.5" piece of paper, this is your middle ground. Draw your focal image, you want to create a center image which then has long narrow arms to it on either side, add some color.
Cut the image out, keep those arms that go the full length of the paper.
Fold in half and place aside.
Take your background and fold it in half.
You now are going to glue your middle piece to your background. Only apply glue to the ends of your arms from your middle piece.
Your middle piece is 1 inch shorter than your background but you need to match up the ends. By putting the folds in you are able to get the ends to meet.
It will look like this from above. Please note that on this picture my ends shifted and they don't match up to my background. They should match up.
Take your scrap piece of paper and draw a few elements that will be in your foreground.
Add color.
Add some glitter if you want.
Cut out. Notice that my details are very narrow that is so they don't overwhelm my focal image in the middle section.
Take your long piece of paper and place some folds in the following places. Click on the picture to see larger.


Using the 6" section fold in 1/2.
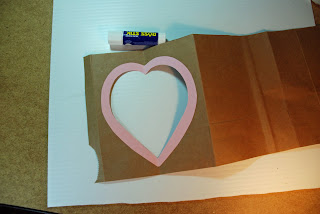
Cut a heart shape out. This is the front of your diorama card.
Take that heart that you cut out of your paper and use it to trace onto your colored piece of cardstock.
Draw a heart about 1/2 inch larger around the traced image. Fold this paper in half.
Cut the inner heart shape out and then cut the larger shaped heart out. You will have a heart shaped frame.
Using the glue stick, glue this frame onto the heart cut out on your long piece of paper.
Turn this paper over. You can glue your foreground bits on at this time. You can also tape them if needed as you won't be able to see the tape in the final piece.
Glue your background/middle ground into place on the two 5" sections of your long piece of paper. Try to match up folds. Your long piece of paper will be 1 inch larger than your other pieces...try to center it the best you can.


You can also add embellishments to your foreground if needed. It sometimes easier to cut pieces out seperately and then glue on to the middle ground......you might also find you need to add some elements as you start to put the card together.


The card should fold up together. Your heart framed piece will fold up inside.
Take the little flap (1/2")and glue it down to the back of the card so it is all sealed.


When you open up the card you will have to just push the middle ground away from the background a bit for the fist few times. When you look down into the card it should look something like this.


These cards are very charming and you can come up with lots of different scenes.


Give it a try.


See you next time. I'm trying to do the Virtual sketch Date this month as I have been too busy the last 2 months so hopefully (fingers crossed) I can post my painting tomorrow by the deadline.

later
gail