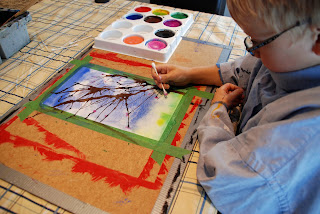
This post comes from a request by a teacher to do a Spring Tree version of an earlier post: How to Paint Fall Trees.
Very much the same with color changes. Please check out the Fall Tree post for more pictures on this technique.
Materials Required:
paint...I used cake tempera
paper
paintbrush
drinking straw
q-tips
painter's tape

Tape your paper down to your art board. I always tape off any painting work as it provides a nice clean-edged mat for presentation.
It works especially well for this project.
 Paint in your sky. We are using watercolor paper so we can use a wet on wet technique. We wet the paper with plain water to start and then add our blue sky color at the top. We slowly work our way down with color...the paper will also pull the paint down. This is also called a gradient wash.
For the clouds we pull some paint off the paper while it is still wet with a kleenex. Just blot it off in a circular motion to get your cloud shapes.

Add some green paint to the bottom as well as a little yellow...you can also add a bit of pink.
Let your painting dry completely.
Mix up some dark brown paint...you want it to be ink like in consistency.
Place some at the side and start blowing your tree using the straw. We used an eye dropper to place our paint where we wanted but you can just drop it with your paintbrush or even a spoon.

Continue to blow your tree. Add extra paint along the way.

Let your tree dry.
I found the trees positioned off to the side made for a better composition.

Using a q-tip take some pink and green to dot in your spring blossoms and new leaves.
You don't need to fully coat your tree with these....you want only a few here and there to resemble a tree just starting to bloom or leaf out.


No comments:
Post a Comment