I have a plan to do a large stained glass Rose window display at school.
It will be made up of smaller stained glass compositions by each of the students in either Grade 3 or 4.
When I was in Paris this summer I couldn't get enough of the amazing stained glass "Rose" windows. This is one from Notre-Dame on the outside but when you go inside.......
This is what you see...it literally stops you in your tracks...the ones at the Cathedral in Reims are even more amazing. When you consider that these windows were constructed in the 13th century, the skill and artistry these windows demonstrate is truly awe inspiring.
Please click on picture to see larger.
Another aspect of the windows which surprised me is the depth of the composition. The way the glass artists etched in the folds of the clothing, details of the faces, and even shadows for a 3D look. Surprising when you consider shading doesn't really show up in painting much until Giotto's "Francis of Assisi Receiving the Stigmata" which he painted between 1295 - 1300.
The Rose windows were completed in 1270. These figure windows were completed much later however they show similar detail that is in the Rose window I just don't have a close up picture to show you (the windows tower above you, so a little difficult to photograph).
MATERIALS REQUIRED:
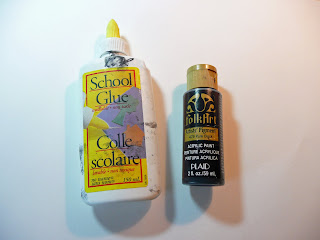
-regular white school glue
- black acrylic paint
- tempera disk paints
- watercolor paper or heavier weight sketch paper
- paintbrushes
- stained glass reference photos
- circular objects for tracing
- fine sharpie
Anyway...our stained glass will be done on paper in the method I first outlined in this post.
We will be concentrating on the round portions of the petals in the Rose window.
To get our round shape I traced a circle using a small foam plate.
I then wanted an outer circle so I took a larger plate and traced it as well....probably would be easier to do this in the opposite order at school.
I then used a roll of tape to get my semi circular shapes in place.
I sketched out the design I wanted, I used the "Virgin Mary" as depicted in Notre-Dame but you can use any design of your choice.
Take a bottle of regular white glue and add a few squirts of black acrylic paint into the bottle. Shake well.
Go over your pencil lines with your black glue.
Make sure to do this on a flat surface so your glue does not ooze where you don't want it to.
You can make some lines thicker than others if you wish.
Leave to dry on a flat surface.
When the glue has dried start painting in your sections. The raised glue edge helps to "corral" the paint making it easier to paint. With very young kids you can just let them paint the whole thing with a few colors rather than piece by piece...it will still look pretty terrific.
For the fine etching lines use a fine sharpie after the paint has dried.
Cut out circle.
I plan to make the rest of the petal parts with construction paper but the main focus will be on the circular sections.
That's it.
See you next time.


