Tattoo
Showing posts with label fall. Show all posts

Finger Kites

Calgary is a pretty windy city, especially in the Fall when the leaves turn and last.....oh maybe 10 minutes before being blown into oblivion.

You have to enjoy those Fall colors when you can!

So here are some Finger Kites we made.  They are smaller than your usual kite so you only fly them about 1 metre high but the kids like chasing each other around with them.  I had a few issues with this one but I'll tell you about it as we go.

Now you can make kites out of fabric but I was looking for alternatives.  You don't want to use paper or your kite will be one time only.  If it is only decorative, paper would be fine.

We made one kite out of Tyvec or house wrap which you can get at the hardware store (a bit pricey and the smallest roll is 100ft)...some courier envelopes are made of Tyvec these days so check your stash of recyclables.
For the second one I fused 2 plastic shopping bags.


I cut the handles off and sandwiched it between 2 pieces of parchment paper.

Set my iron on med and ironed over the paper.  The parchment is transparent enough so you can see the bags as you iron and you will see them shrink up a bit.
 When it has fused together you are good to go.


I cut out a kite pattern out of some old poster paper.

My width was 10 inches  and the length was 12.


Trace pattern onto your material and cut out.


Now the Tyvec painted up great even with tempera...if you find the paint beading up a bit give the kite a rub with a little sandpaper.

The fused plastic seemed to paint up just fine with acrylics BUT don't be fooled.  The paint will flake off with use so I recommend that you either give it one thin coat of paper mache and then paint or use paper, stickers, etc...glued onto it to decorate.


Cut your sticks.  I use natural bamboo plant stakes from the garden store...cheap and pretty straight.


The best way to attach your sticks is with tape....duct tape, metal tape, hockey tape, bookbinding tape.....


Add your string tying and knotting it several times in the center of your kite and then take a good length and wrap around a stick for your handle.


Add a tail with bits of fabric or ribbon.  I tied it to the stick at the bottom and then added...you guessed it...another piece of tape to secure.


and that's it.  Wouldn't you know it when we finished..no wind!


See you next time.

Fall Trees Version 2


I was looking at my Fall Trees project and wanted to try a variation.

Bright blue sky with vibrantly colored leaves on the trees...this is what we came up with.


Ryan, age 10, completed this beauty.


We tried white for our tree trunks to look like an aspen or birch but I found it too winter like....( future Jan. project)....so I think we will stick with black.


MATERIALS REQUIRED:
- watercolor or tempera paints
- watercolor paper
- painter's masking tape (optional)
- drinking straws
- cotton swabs or Q Tips
- acrylic or liquid tempera paint in fall colors


I like to tape off my watercolor paper with painter's masking tape to give me a clean white border on my finished project.

It makes for a nice presentation on the bulletin board at school as well.

Draw in a horizon line in pencil.  For more info on horizon lines see my lesson here.

Paint in a sky with watercolor.  You want a nice graded wash so I get the kids to first wet the paper with plain water and then add some color.  You want it darker on top and fading as it reaches the horizon.


Paint in the ground on the bottom half of your horizon.
  I tried a sample without a horizon just sky and it seemed the tree needed the extra color around the trunk of the fallen leaves.

Leave to dry.


Mix up some black paint to an inky consistency (you could also use India ink).  Using a paintbrush paint in the beginning of the trunk from the ground.

Using an eyedropper (save the ones from liquid medicine) drop in some paint and have the kids blow in the rest of the trunk and the branches.

Continue to add paint where a branch is needed and continue blowing until you are happy with your tree.

Leave to dry.


Dab into acrylic or liquid tempera with cotton swabs and add leaves to your trees.

Include some fallen leaves on the ground.


Less tends to be more in this case.  You don't want to overdue and lose the branch detail on your trees.


Here is Jeff's, age 7, version.

I plan on doing these with Grade 2.


Take care and we will be back with more art adventures soon!


UPDATE: Here are the Fall Trees (version 2) that the Grade 2's completed this week in time for Parent/Teacher interviews! Click on to see larger if you wish.  Great job Grade 2!

Paper Roll Squirrel

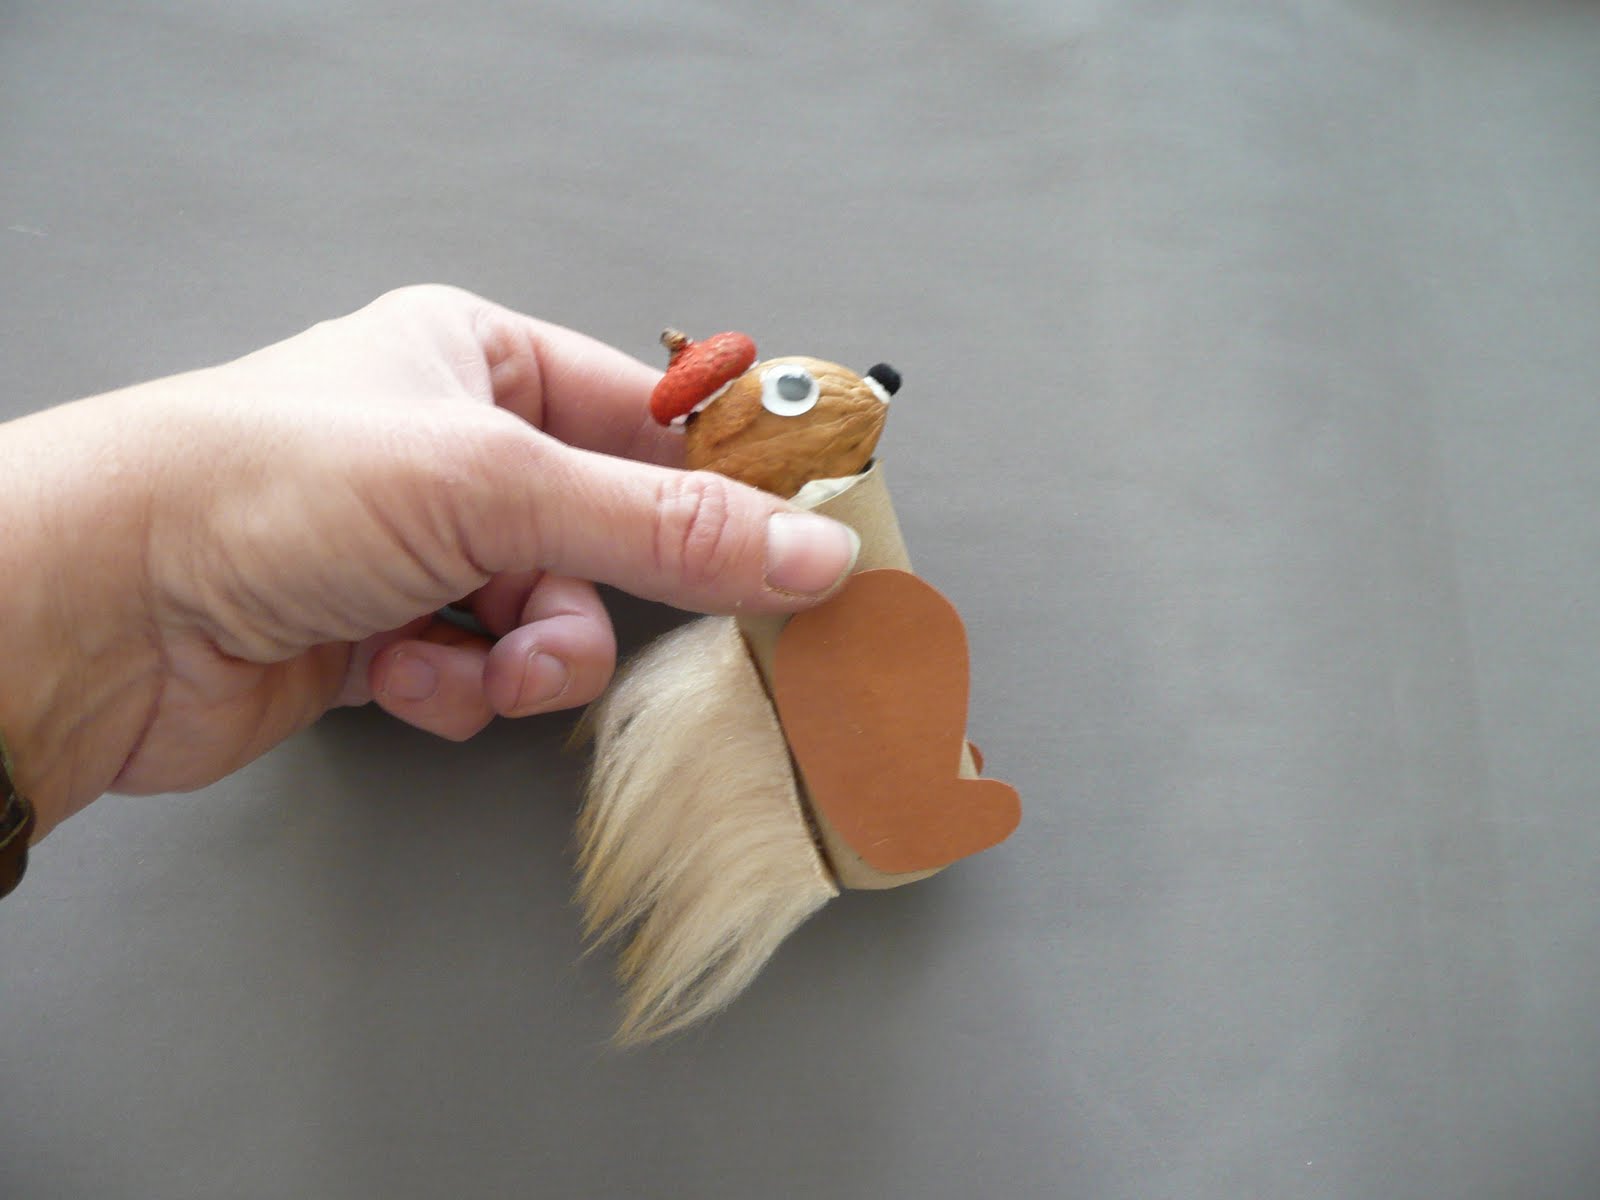
A few weeks ago I had to come up with a craft for my son's Beaver's troop fast. They were discussing squirrels and it had to involve a nut.


As with most Beaver crafts it had to be fast and doable for boys aged 5 to 7. These turned out to be such a hit I thought I'd post it.


I know I promised the project with the Halloween candy boxes and it's almost ready...I put a sneak peek at the end of this post so stayed tuned.

Materials Required:


walnuts

paper rolls

1/2 a piece of paper towel

2 googly eyes

1 small pom pom

some felt

squirrel leg template

fun fur scraps

acorn cap

glue


Take the paper roll and cut it down to a 3 inch length.


Take the 1/2 of paper towel and stuff it into the roll.


You could paint the paper roll if you want but we left ours natural.


Make sure it is even with the top of the roll and put some glue on top.


Place the walnut on top of the glue. make sure the walnut is on it's side so you have the seam of the nut running down the middle of the head...this will also give you a pointy end for your nose.


Glue on your eyes and the nose.


With some scraps of felt cut out 2 ears and glue into place.


We painted our acorn cap so our squirrel had a fancy hat but you can leave it natural. Glue into place on top of head.


Using the leg template cut out 2 legs. We used brown paper but you could also cut these from felt.


Glue into place.


Cut your fun fur into a 2 inch strip about 1/2 an inch wide.


Glue into place.


Take some felt and cut two strips. Round the edges on one end. Glue into place for arms.


And that's it. Pretty simple but the boys had a great time and I received lots of positive comments from the parents.


My son added a felt piece for the belly of his squirrel who is now proudly called "Nutty".


Jenny from Plant City, Florida sent me this photo of the Fall Trees her 4th Graders did. They added a Fall Poem and have been getting wonderful compliments on their display.
I decided to add an Art Project Gallery component to this blog . If you send me a photo of your work using the lessons on this blog I'll put it in the gallery. Just email me...click on my profile at the top to direct you to my email.
Thanks Jenny..they look terrific!!

Here is a sneak peek of the upcoming project.


We'll see you next time.

A Tale of Two Turkeys: Turkey #2 Salt Dough


Here is Turkey #2. A lot quicker than clay and just as charming.


These are salt dough turkeys that Grade 4 completed.


Materials Required:

salt dough, see recipe at end of materials list
paper clip
rolling pin
dull knife
water
whole cloves (optional)
oven
acrylic paint
Mod Podge
skewer


Salt Dough Recipe
4 cups flour
1 cup salt
1 1/2 - 2 cups water


Combine ingredients to make a soft dough, knead in some extra flour if required. This dough will keep for quite a while in the refrigerator.


This is enough dough for 6 turkeys.


Roll out the dough to about 1/2 and inch thickness and cut out a round about 3 and 1/2 to 4 inches in diameter.


I'm using a tomato can...I have one of those can openers that leave no sharp edges...perfect for crafting.


Take your paper clip and insert it into the top of the round for a hanger.


Take some more dough and roll out a rectangular shape.


Cut some strips about the width of your finger.


Using a skewer make some indentations that look like feather marks.


Cut to size and using water glue into place.


It should look like this but feel free to alter as you wish.


Roll out some more dough and cut a small round about 1 and 1/2 to 2 inches in diameter.


I'm using a tomato paste can.


Glue into place with a little water.


Now you need to make the head/neck. Roll a little sausage shape.


Glue into place with a little water.


Make a triangular beak.....


Glue into place.


For eyes you can use two whole cloves or make some out of little balls of dough.


You should end up with something like this.


Here is one of the trays from Grade 4.

Bake at 300 degrees for about 3 hours or until hard.


Let cool.


With acrylic paint add some color to your turkey. The easiest way to paint it is to start with the bottom round and paint your way up just like the way you put your turkey together.


When the paint has dried you can give it a coat of glossy Mod Podge and add a ribbon for hanging.


That's it.


Here is the display of squirrels Grade 1 made. I described how to make these in an earlier post here.


Great job Grade 1!!


See you next time.