 May 5th is Kodomo no Hi or Children's Day in Japan.
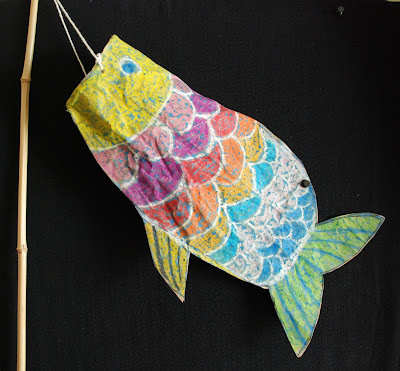
These Koinobori or flying carp windsocks are a great way to celebrate. I have 2 tutorials to share... the fabric version with the glue batik and a bit of sewing and a easier version using paper and pastel resist.
So let's get started
Fabric Version
MATERIALS REQUIRED:
some lightweight fabric, cotton works well
Elmer's gel glue
acrylic craft paint
paintbrush
sewing machine
12-14" length of wire
pole...we used a natural bamboo garden stake
fishing line
fishing swivel (optional)

I had the kids draw out their design first on paper. Because we are making a fish with 2 sides but folding it in half it's good to get them to practice how it is laid out.

Cut a piece of fabric approximately 24 inches long and 16 inches wide. Lay flat on top of some wax paper. We also have ours on top of an art board so I can move it easily.
Using Elmer's blue gel glue recreate your fish design on the fabric.

This glue works the best when doing this glue batik technique. It is the no run gel formula. I find the glitter version hard for the kids to squeeze and the clear version will run messing up your design.

This glue works the best when doing this glue batik technique. It is the no run gel formula. I find the glitter version hard for the kids to squeeze and the clear version will run messing up your design.

We did half of ours using the glitter glue so you could see our design in the picture.
Put aside and let dry overnight.

Using watered down acrylic craft paint..put some color on to your fish.

Set aside to dry.
When dry soak in some hot water in a sink or bathtub...after about 20 minutes the glue will have softened and dissolved. You may have to lightly scrub or agitate it to remove the glue.
Let dry.

Fold over about 2 inches at the mouth of the fish and sew the width of the fish creating a pocket for our wire.


Fold over about 2 inches at the mouth of the fish and sew the width of the fish creating a pocket for our wire.

Insert the wire at this time.

Bring the ends together forming a circle for our gaping fish mouth. Twist the ends on top of each other... you may have to use some pliers.

Your fish mouth should look like this.
With right sides facing sew a seam the length of the body..sew up the tail leaving a small gap it the center of the tail to allow some air to flow thru your wind sock.

Here is the gap. Cut away excess fabric from the seams. Turn the fish right side out.

Your windsock should look like this.

Attach a 16 inch piece of fishing line to each side of the mouth. I find the fishing line is stiff enough that you can just poke a hole thru the fabric with it.
Try to get the places where you are attaching the line to be even to one another.
Attach to pole. You can use a fishing swivel to prevent the windsock from getting tangled in the wind.


Paper version
MATERIALS REQUIRED:
heavy brown kraft paper..I used a paper bag
scissors
pastels
tempera paint
paintbrush
glue
string
pole
Fold in half.

Trace out a fish shape. Cut out shape keeping as much of the fold on the top of the fish as you can.

Open up flat and start coloring in your fish using pastels.

When finished carefully crumple up.
 Open up flat and smooth out a bit. Taking some tempera paint, paint over top the pastel. It will resist the paint and cause it to bead up making it look like your fish is underwater.
Cover your fish completely.
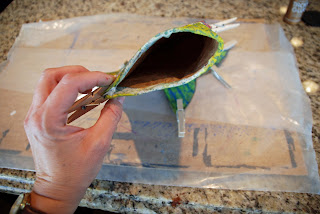
Run a bead along the inside of the mouth edge of the fish.
Roll the edge up enclosing the pipe cleaner.


No comments:
Post a Comment