Well I'm back after an extra long Thanksgiving break.....next up Halloween so we better get a few scary art projects up on the blog.
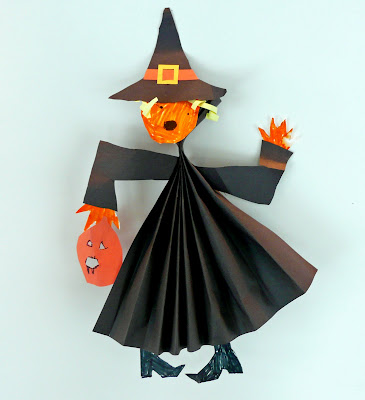
This is a paper fold witch my son did last year in Grade 3. It's got a certain charm to it so I thought I'd post it this year....Thanks Mrs. M for your idea.
Materials Required:
templates, witch 1 and witch 2
black paper, one 8.5 x 11 and some scrap
white cardstock or manila tag
orange paper
yellow paper scraps
purple and/or green paper scraps
glue stick
stapler
scissors
tape or tacky glue
paint, pencil crayons, or felts

Using the scrap black paper trace around the arm templates with a white pencil crayon or gel pen and then cut out.

Do the same with the hat.

Cut a strip of orange and glue to the hat for a band...glue on with the glue stick and then trim to fit.
Cut a small rectangle out of the yellow, fold it in half and then cut a square out of the middle...unfold and then glue on to the hat as a buckle.

On the white cardstock or manila tag you want to trace out the face, 2 hands, and 2 shoes.

After tracing add some color...I made the witch green but its hard to tell in the photos.
Outline with fine black marker for extra emphasis.

Cut out some hair out of the purple or green scraps. Cut out a jack o lantern as well.
Cut out your painted pieces too.

Glue the hair in place with a glue stick and then add the hat.

Taking the 8.5 x 11 piece of black paper accordion fold the entire sheet.
This is a great skill for younger kids to learn.

Holding the paper together staple it about 2 inches from one end.

Flare out the top a bit....you may have to fold it down a bit to get it to stay.
You have now created the Witch's high couture outfit.

Using glue or tape secure the head on the flared top...you want some out it showing so it looks like a fancy collar.

Glue the hands into place...you want one arm to go up and one to go down. Secure in place on the dress.
That's it.


No comments:
Post a Comment