


Well things got a little fishy yesterday as Grade 2 did Gyotaku, traditional Japanese fish printing.
Here the fabric print is sewed onto a enviro grocery bag. Mine had a logo on the front so I just turned it inside out.

Here are some of the paper prints. You can see we had a lot of Rainbow Fish!

So you need a fish, I got mine from the supermarket the day before. It was not gutted. This made for a better print with a full fish. We used tilapia as they are easy to find and the have a really nice scale for printing.
-and no I didn't realize the headline for this photo ahead of time!

Now the traditional method is to use India ink but I found it was just too watery for a good print so we used acrylics which also gave us a permanent print on our fabric versions.
Paint your fish.

We did our paper print first. Lay your paper on top of your painted fish and gently press. You are trying to get a good outline so I would ask the kids to find the tail, the mouth the eye, etc.
Lift and set aside to dry.

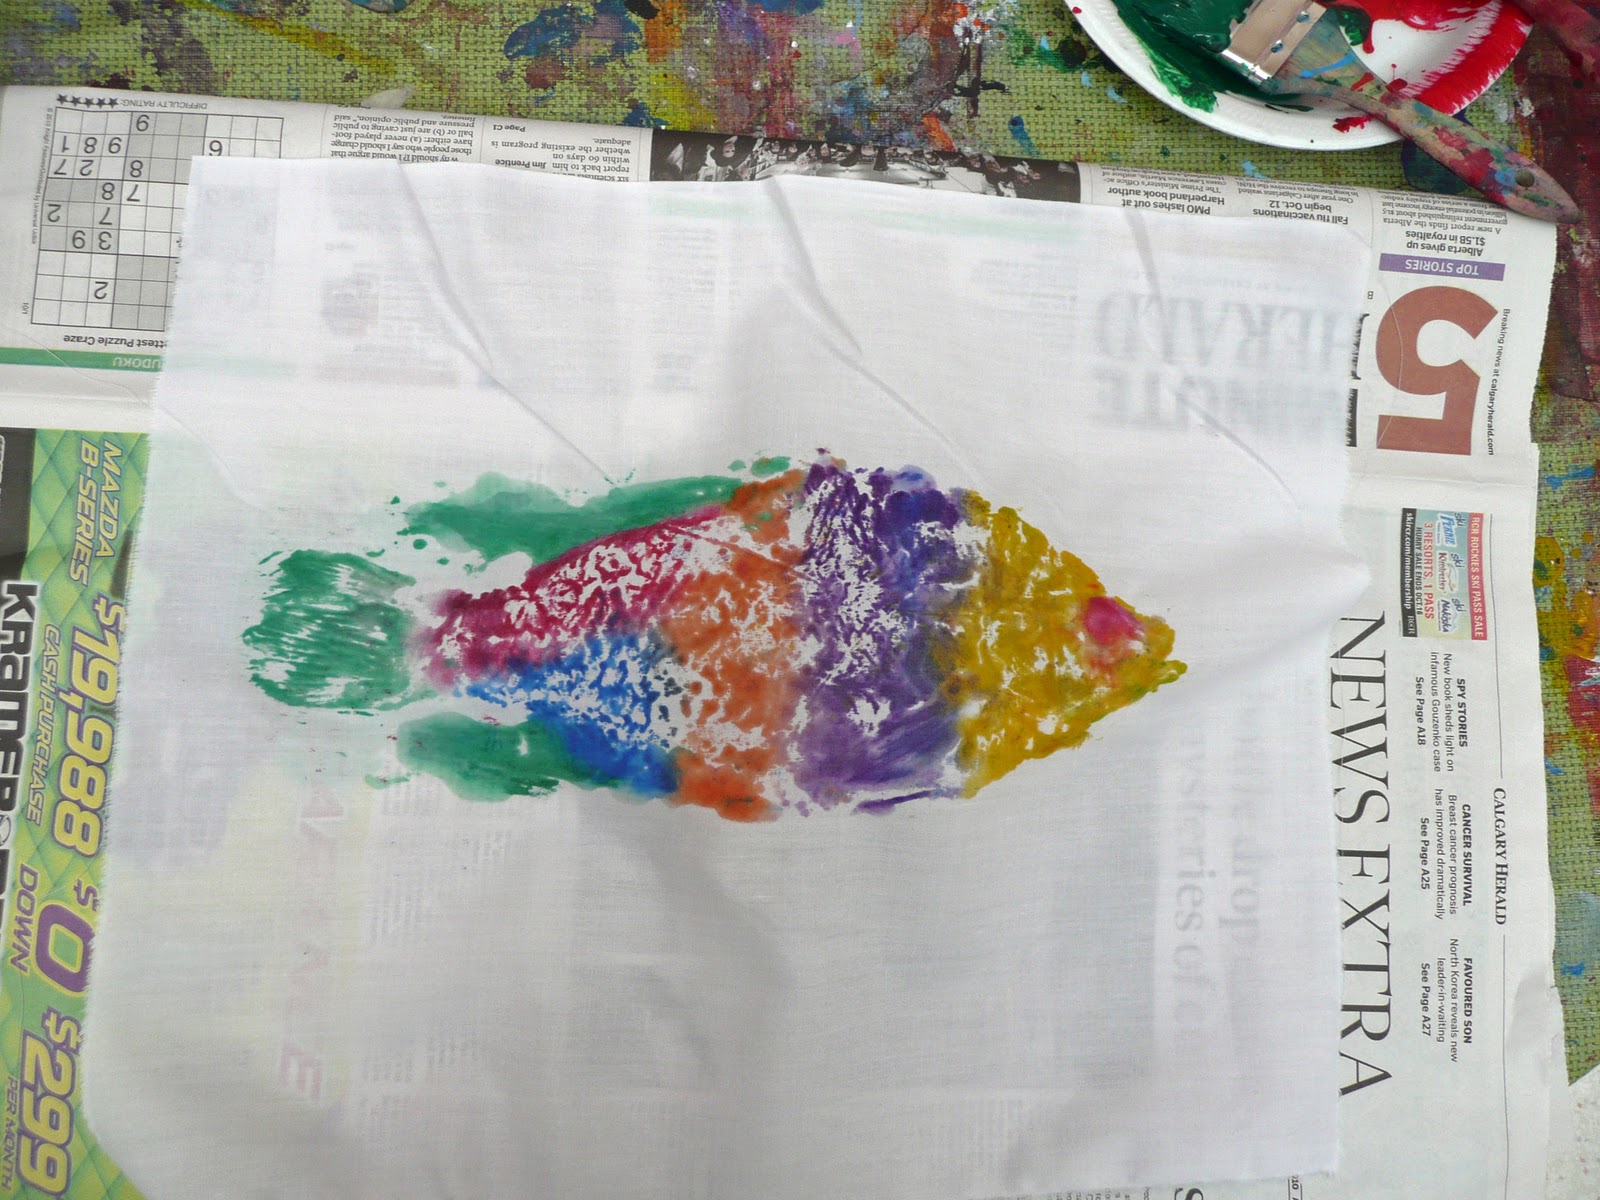
Next up is the fabric print. We placed cotton muslin on top of the fish, we did not repaint it in between, the paper print blotted away the excess paint.
The kids would press down on the fabric amazed by the scale detail coming up.

Lift and set aside to dry.
Now I had 3 fish and I would wipe each one off with a baby wipe in between as well as place it in a tub of water for a quick dip before the next student would begin painting.
When the print is fully dry you need to run it through the washing machine or else your prints will smell. You don't have to worry about the paper ones, no fishy smell there!
Some kids even had a scale become embedded in there paper versions, very cool!
That's it, now I have 23 more grocery bags to sew so I'll see you next time.


No comments:
Post a Comment