This is a very easy Angel Caroler that we did last year as part of our "Christmas Craft Day". (150 kids, 1 morning, 12 crafts)
This year Kindergarten is making them and I thought I'd share it with you.
I apologize for not letting the glue dry before the photos but I'm fighting for the light....not much time after school to photograph before it's dark!
You will need:
- a pattern template
- some cheap batting fabric (I like the sparkle)
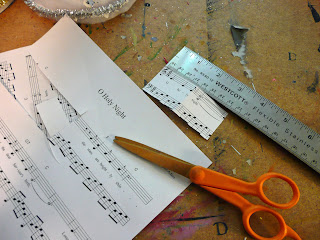
- some sheet music try here
- tacky glue
- a 2-3 inch Styrofoam ball
- flesh colored acrylic paint
- pink acrylic paint
- some garland
- a white pipe cleaner
- a fine sharpie
- some white cardstock or posterboard
- some sequins or embellishments
First you need to paint your Styrofoam ball. We also added some glitter for a bit of sparkle.
After it has dried use your fine sharpie and put in the eyes (closed ) and the mouth. Now you could paint these in if you wanted but I find young kids have more control with the sharpie.
Take your pink acrylic paint and using the end of a pencil dot the cheeks.
Take the pattern and trace and cut out of posterboard, cardstock, or manila tag.
Cut the same pattern out of the batting fabric. but this time do not cut out the notch in the center.
Staple your posterboard cone together.
Put glue all around the edges of your fabric on the wrong side. (non sparkle side).
Cover the cone and just tuck in the fabric in the center.
Take your white pipe cleaner and make a loop at each end for the hands.
Cut a piece of batting fabric 3"x7", lay your pipe cleaner in the center, put glue along one edge of the fabric, fold in half.
Take a 8 inch length of garland and wrap into a circle.
Glue onto the head of your angel.
Put some glue on the center of your cone and secure the head.
You may have to hold for just a minute while the glue sets up.....
Put some glue on the center of your arms.
Attach to your angel. Try to make them come from the shoulder area...I find kids often want to have the arms coming out of the waist.
Now you can decorate your angel a bit with extra garland, sequins, snowflakes......
Cut out a strip of music about 3 inches long and the width of the bars.
Glue into place..I like to have the music facing out but you can also glue 2 strips together so you can see it from both sides.
If you want wings you can cut some from a gold or silver doily or even 2 petals from an artificial flower.
Secure on the back of your angel.
and that's it.
I hope your class makes a choir of Angels and I'll be back with more Christmas projects soon.
Take care.


No comments:
Post a Comment