Calgary is a pretty windy city, especially in the Fall when the leaves turn and last.....oh maybe 10 minutes before being blown into oblivion.
You have to enjoy those Fall colors when you can!
So here are some Finger Kites we made. They are smaller than your usual kite so you only fly them about 1 metre high but the kids like chasing each other around with them. I had a few issues with this one but I'll tell you about it as we go.
Now you can make kites out of fabric but I was looking for alternatives. You don't want to use paper or your kite will be one time only. If it is only decorative, paper would be fine.
We made one kite out of Tyvec or house wrap which you can get at the hardware store (a bit pricey and the smallest roll is 100ft)...some courier envelopes are made of Tyvec these days so check your stash of recyclables.
For the second one I fused 2 plastic shopping bags.
I cut the handles off and sandwiched it between 2 pieces of parchment paper.
Set my iron on med and ironed over the paper. The parchment is transparent enough so you can see the bags as you iron and you will see them shrink up a bit.
When it has fused together you are good to go.
I cut out a kite pattern out of some old poster paper.
My width was 10 inches and the length was 12.
Trace pattern onto your material and cut out.
Now the Tyvec painted up great even with tempera...if you find the paint beading up a bit give the kite a rub with a little sandpaper.
The fused plastic seemed to paint up just fine with acrylics BUT don't be fooled. The paint will flake off with use so I recommend that you either give it one thin coat of paper mache and then paint or use paper, stickers, etc...glued onto it to decorate.
Cut your sticks. I use natural bamboo plant stakes from the garden store...cheap and pretty straight.
The best way to attach your sticks is with tape....duct tape, metal tape, hockey tape, bookbinding tape.....
Add your string tying and knotting it several times in the center of your kite and then take a good length and wrap around a stick for your handle.
Add a tail with bits of fabric or ribbon. I tied it to the stick at the bottom and then added...you guessed it...another piece of tape to secure.
and that's it. Wouldn't you know it when we finished..no wind!
See you next time.
|
|
---|
Painted and Embroidered Mini's
I wanted to use that paint embroidery combo again but this time on framed canvas.
These are my Autumn leaves.....
I painted the canvas first and then embroidered on the detail.
The kids wanted to get in on the act so yesterday we spent a great afternoon creating our little masterpieces.
I bought little framed canvases at the dollar store...I think it was $2 for a pack of 3. They measure 6 x 6 inches square.
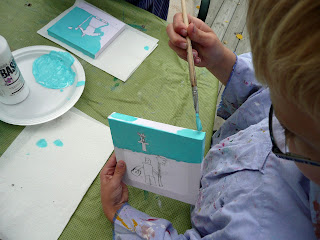
We lightly sketched out our design in pencil...as you can see my son uses a heavy hand like most kids with the pencil, the paint covers most of it.
We then began painting our background in.
Make sure to paint the sides as well as we won't be framing these guys.
We used acrylic paints for good coverage.
When you are finished let dry.
Then we started to embroider....you can go over outlines, add texture stitching, or even add extra embellishment.
The frames made it very easy for the kids to embroider as it is much like having a hoop. I was surprised that the canvas was quite durable and we had no rips due to pulling too hard.
I think the boys did a great job.....my daughter is still embroidering her starfish..she's adding lots of detail.
and I'm quite pleased with the leaves.
We also had a family birthday over the weekend and I thought I show you how we wrap presents. I place the item to be wrapped in a leftover plastic shopping bag and the wrap it in plain kraft paper. I then paint it. I try to involve the kids but this time they were too busy embroidering.
That's it.....we'll see you next time.
Labels:
embroidery,
kids painting
Owl Projects Take 2
Here is a mixed media Owl project. I can't even show you the finished project in it's entirety.....I need a large scale scanner...(I'll put that on my Christmas list)!
So this project is based on the Great Ga'Hoole tree.
Take some heavy sketch paper or watercolor paper and sketch out a tree. We did ours to the side so we could get more owls in...
Paint in your night sky with some blue and black tempera mixed together.
As your sky goes down towards the horizon use lighter colors and more water.
While the sky is still wet you may want to lift out a moon. I'm using a toonie but you can use any circular shape as long as it's flat on the bottom...at school I often use the stacking cups.
Wrap in a kleenex....
Push down into the wet paint where you want it....
and lift off.....a perfect full moon shape.
If you want clouds around your moon use a paintbrush dipped in water and then make a few lines thru the moon pulling some of the paint thru.
Click on picture to see larger.
Continue painting in your sky and your Island of Hoole.
Leave to dry.
Take a variety of papers. We used old book pages, corrugated cardboard, brown kraft paper and brown tissue paper.
Apply some white glue (use a paintbrush as you don't need gobs of it) where your tree is and randomly attach papers into the shape.
As you are laying down the lighter papers you can squish them a bit to form the wrinkles and texture of the trunk.
You can sponge on some grass and bushes onto the island. You can also add a bit of color to the tree trunk...we used watered down dark brown and black.
We decided to stamp on our Owls so I cut out some Owl shapes out of craft foam.
I then duct taped these to a narrow strip of cardboard bent up at the bottom....you could also use scratch foam or potato.
Stamp in your shapes...we used black acrylic but you could use liquid tempera just as well.
I couldn't resist and added a few little owls flying to the tree with a Sharpie.
Using the end of a pencil, skewer, or even a paintbrush stamp in some yellow eyes. I combined some yellow with "Glow in the Dark" paint...we'll see if it works. I find the Glow in the Dark stuff a bit translucent.
Let dry and then add a black pupil.
That's it.
Remember these guys...you can find my PomPom Owl tutorial here.
and I still love these Macrame ones I did with Grade 4..check out this post for all the directions.
We'll see you next week!
Labels:
kids painting,
mixed media,
owls
Subscribe to:
Posts (Atom)