Tattoo
Showing posts with label printmaking. Show all posts

Paper Tapas from the South Pacific


Tapa cloth or bark cloth is a traditional  textile from the islands in the South Pacific.  You can see some examples of tapa cloth here.


In the school setting we try to duplicate this process using paper.  This lesson was adapted from my favorite book "Art from Many Hands" by Jo Miles Schuman.

The word Tapa is Samoan or Tahitian depending on what resource you consult and describes the border of the cloth. Tapa cloth is made from harvesting breadfruit or paper mulberry trees.  The inner bark of the tree would be beaten to release the fiber much like flax is beaten to produce linen.  This fiber would then be flattened or "felted" if you will into sheets.  The resulting cloth was used for clothing, bedding, and household items.  Special cloth was made for religious occasions as well as for royalty.  It was quite fragile so it was made quite frequently.

Before we can make our Tapa cloth we need to make some design tablets.  Nice thing about these is once you make a set you can use them over and over again.

I used pieces of foam core board as I had some in my stash but you can easily do this on corrugated cardboard from the recycle bin.

Now traditional designs are based in nature including flowers, trees, fish, animals and birds as well as the sun and the moon.  In Tongo these design tablets were made on large leaves upon which thin strips of palm or coconut twine were sewn forming the design.  Here we make ours with regular household string.  Pencil in your design and then using tacky glue, glue pieces of string into place.


You also want to make these texture boards which just have lines of string.

Easiest way to make these is to smear some glue over the board and then wind your string around the board.


Now to simulate the bark cloth we are using brown paper bags or kraft paper.

You want to take your paper and crumple it over and over quite a few times.

You then can iron it out flat.

If you want it colored like the yellow cloth in the picture above, paint it with some tempera after you have ironed it flat.


Most Tapa cloth is based on a grid design.  Using a ruler make out this grid on your cloth.


Now you want to place a design board under your cloth and using crayon in either red, brown, or orange rub to bring up the image.


Now use the striped string board and in a different color of crayon rub this design around the image you have already brought up.

Don't rub the stripes on top of the design just around it.


 You now want to add some touches with some black tempera.


You can use the end of your paint brush for dots.


You can use a piece of cardboard to stamp in a striped design.


Finally you want to paint your border black.


and that's it.  You could spread this project over 2 sessions.  The first to create your design blocks and then a second to rub the designs and paint the cloth.


Fascinating project and there are lots of resources on the web in google images.  Give it a try.


We'll see you next time.

Fish Prints


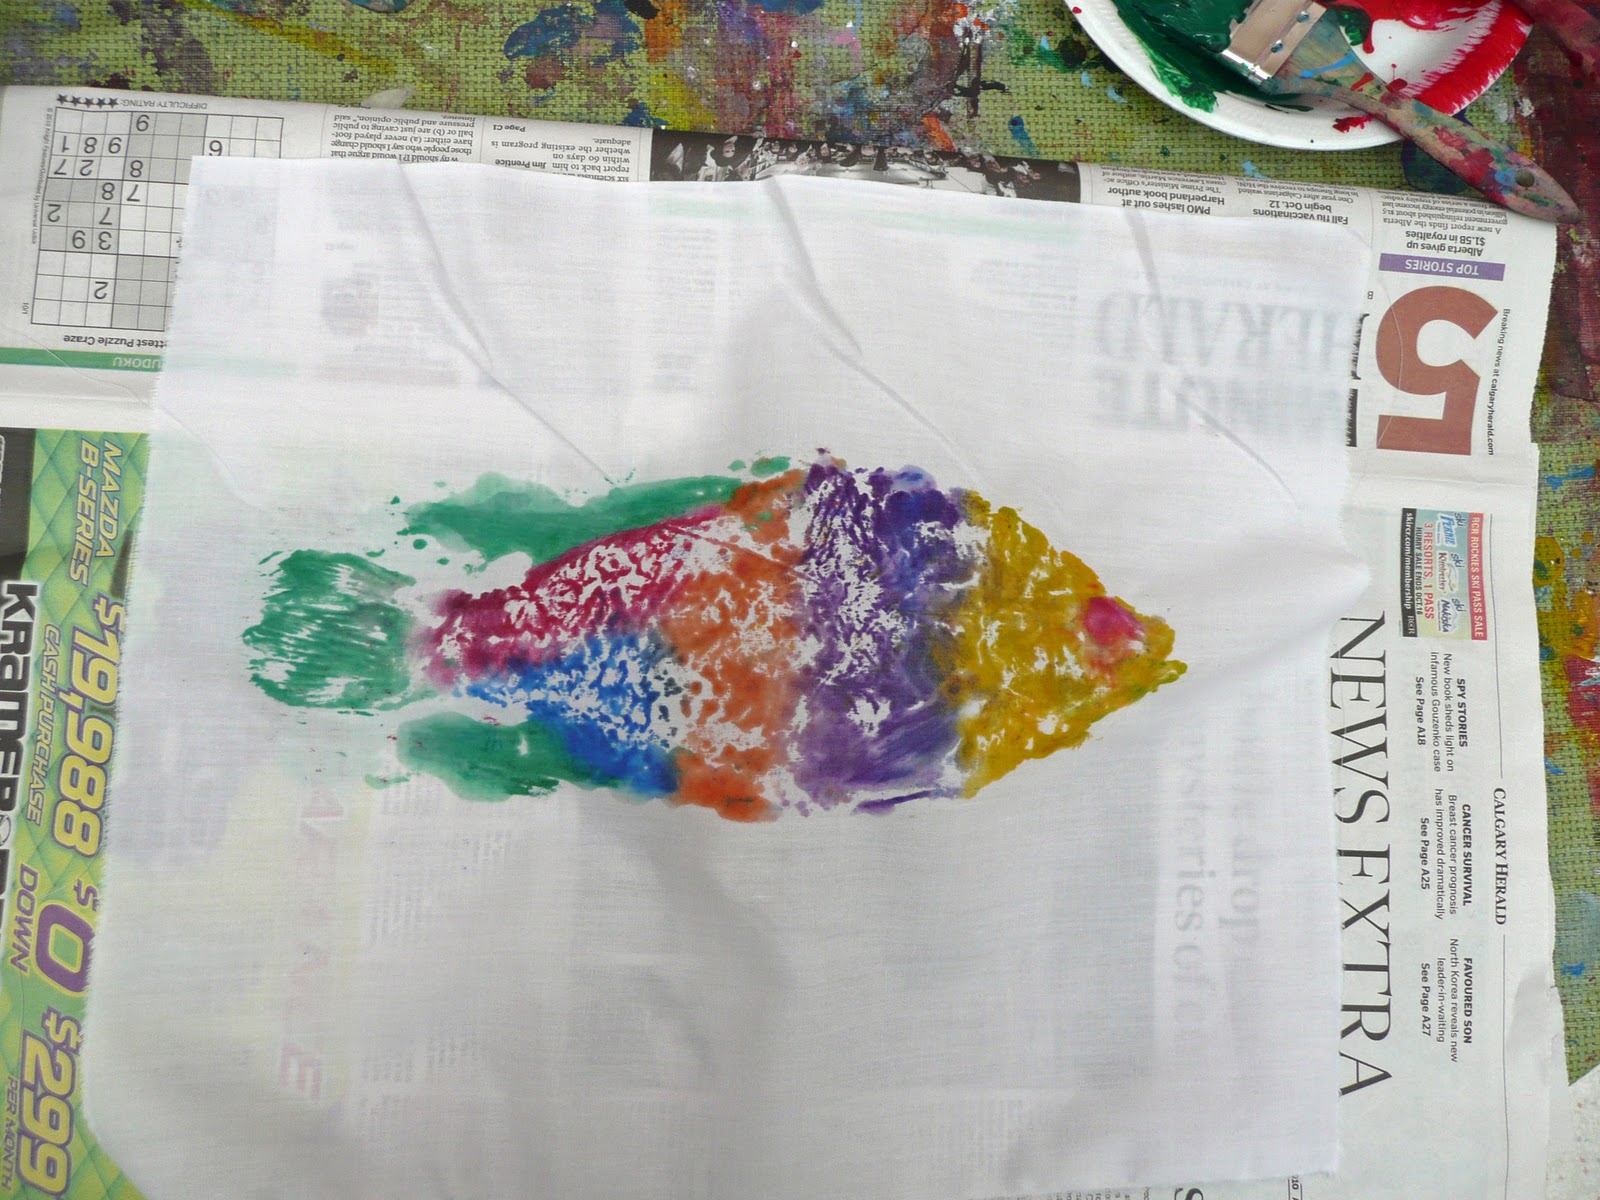
Well things got a little fishy yesterday as Grade 2 did Gyotaku, traditional Japanese fish printing.


Here the fabric print is sewed onto a enviro grocery bag.  Mine had a logo on the front so I just turned it inside out.


Here are some of the paper prints.  You can see we had a lot of Rainbow Fish!


So you need a fish, I got mine from the supermarket the day before.  It was not gutted.  This made for a better print with a full fish.  We used tilapia as they are easy to find and the have a really nice scale for printing.

-and no I didn't realize the headline for this photo ahead of time!


Now the traditional method is to use India ink but I found it was just too watery for a good print so we used acrylics which also gave us a permanent print on our fabric versions.


Paint your fish.


We did our paper print first.  Lay your paper on top of your painted fish and gently press.  You are trying to get a good outline so I would ask the kids to find the tail, the mouth the eye, etc.


Lift and set aside to dry.


Next up is the fabric print.  We placed cotton muslin on top of the fish, we did not repaint it in between, the paper print blotted away the excess paint.

The kids would press down on the fabric amazed by the scale detail coming up.


Lift and set aside to dry.

Now I had 3 fish and I would wipe each one off with a baby wipe in between as well as place it in a tub of water for a quick dip before the next student would begin painting.
When the print is fully dry you need to run it through the washing machine or else your prints will smell.  You don't have to worry about the paper ones, no fishy smell there!

Some kids even had a scale become embedded in there paper versions, very cool!

That's it, now I have 23 more grocery bags to sew so I'll see you next time.

Sun Prints


Today the kids and I made Sun Prints.


We used this kit I picked up at the ranger station at the Redwood Forest.....you can find out more about it here.

You can also make sun prints using regular construction paper. You need to choose a dark color like blue, black, or purple and you need a very sunny day.


First you need to go on a nature hike. The kids scoured the hills for some good material.


We then placed it on the special paper and put it in the sun. With construction paper you will have to leave it for several hours. With the sun print paper this takes only minutes.


The kit included a Plexiglas plate to hold down material in the position you wanted. This also helped keep everything together in the breeze.


You then soak it in water for 1 minute. If using construction paper skip this step.


Here are our prints drying on the deck.

The paper reverses as it dries. The image becomes light and the background dark......with construction paper your image will be dark and the background light.


We then mounted ours on some watercolor paper and hung it in the cabin. The kids found this whole process fascinating and I will have to get some more of this paper.

I would love to do a series of nature prints for the hallway at home.


Still working on our tiny macrame owls....we are trying to do a Momma and a baby as a wall hanging.


we'll see you next time

gail

Printmaking


This is a Printmaking project I did with Grade 6 before my vacation.
Rather than a typical monochromatic print I wanted to introduce them to a layered technique. It turned out quite well and for display we included the individual elements as well as the combined layered print..showing our progression.


Materials Required:

paper...I used a heavy sketch paper
acrylic paint
recycled foam
paintbrush
dull pencil
brayer, rolling pin, or even water bottle or coffee cup


At school I have been using scratch foam because we have a rather large supply of it.
It is basically thin sheets of foam similar to foam plates.
You can find it here.
However it is much more environmentally friendly to recycle some foam containers...you know the ones they usually are meat trays.....


mushroom containers.....food containers..etc.

If it has some texture to it turn it over you should be able to find a smooth surface somewhere.


For this project we were doing a landscape. I had the kids determine their horizon line first and then we cut our foam sheet on this line.
I talked to them about the rule of thirds which I use repeatedly when creating art. How it is more visually appealing for the horizon to be in the bottom or top third rather than in the middle.


Using a dull pencil make your design. You want it to have simple line detail. No fussy stuff but make sure you have enough in the design to make the print interesting.


Do all your background pieces.


We are also adding some foreground elements. For this we are using scrap pieces of foam cut into shapes which also have some line details on them.
These are only about 1-2 inches tall.


Now the fun part....put some acrylic craft paint onto a palette. I am using a foam plate which I can then recycle( I let the paint dry and reuse it)
Don't dilute the paint it should be the perfect consistency straight from the bottle.


Paint completely one element. Don't scrub the paint into the design you just want to coat it completely with nice easy strokes.


Lay down into place on your paper.


Using a roller gently apply some pressure to the foam. If you press too hard you will lose the design. Make sure you cover the whole area.


Lift to see result.


For this project we did 2 prints for each element. The combined print as well as an individual print of each piece.


Take your little foam shapes and paint them.


Place on your composition. gently apply some pressure.


Lift off. They are almost like little foam stamps.


Continue until you are happy with your composition.


Here are all my pieces ready to be mounted.
I also got the kids to come up with a title for their print.


Mount on posterboard for display.
Give it a try, printmaking can become very addictive.
I have used this method on fabric as well. Because you are using acrylic paint you will have a durable print that holds up to washing.
We have made table runners, placemats, t-shirts, as well as printing on canvas for wonderful wall hangings.
see you next time
gail