Near the end of the school year, one of the Grade 5 teachers asked me to do a lesson on surrealism, specifically to have the kids paint their own copy of Rene Magritte"s Golconde. Well I fussed awhile over how I was going to do this.
They needed to mask several duplicate shapes. That way they could do a light airy background with watercolor washes and then do more detailed work in the masked areas with colored pencils, markers, etc.
Masking fluid for 28 kids was just not practical given the amount of area needing to be reserved. Asking them to preserve their whites with their brush skills in multiple areas identical in shape was also not going to fly, I could see the tears already.
Tape seemed the only practical approach but we couldn't use exacto blades to cut our shapes. Normally you place tape down on your area, sketch out your shape and then using a blade cut away the excess without harming your paper.
So I came up with this masking tape sticker idea. It works so well I use it now for all my paintings where I need a large masked area or where I require a very clean line.

.jpg)
You need painter's masking tape, it can be green or blue(green is cheaper). Take a piece of wax paper and lay several pieces of tape on the wax paper. DO NOT PRESS FIRMLY DOWN, light touch only or else you'll have a tough time removing your custom made sticker.

With pencil draw the shape you require to mask off. If your shape is larger than the width of the tape just overlap 2 or more pieces. I outlined these with marker so you can see them.

Then you cut out the image with scissors including the wax paper backing. If you want multiplies of the same image you can use it as a template and trace around it.
When you are ready to use your sticker remove the wax paper backing...
and stick onto your paper or canvas. Now you can press FIRMLY and make sure you get all the edges.
Paint over your sticker while you lay down your background washes.
Let your background dry completely...you have to resist the urge to peel off your sticker too early. Once fully dry carefully pull off your sticker to reveal your pristine white area.

Now you can add color to your image to finish your painting. The masking sticker gives you a nice clean edge around your image to play with instead of trying to paint in your background after the fact.

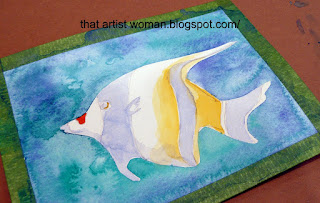
And here is the finished painting which also qualifies for my daily practice for today!!
5x7 140lb wc paper


No comments:
Post a Comment