Tattoo
Showing posts with label Easter. Show all posts

Bunny Willows


Here is a really cute craft I'm calling "Bunny Willows".

I was at Dollaramma and they had these great packages of pastel colored pompoms, which of course I bought thinking I would come up with something.


The kids had a great time making these and I did this craft with both the Beavers troop (5-8 yr olds) and Kindergarten.


Materials Required:

a branch
large pompoms
med. pompoms
teeny tiny pompoms
tiny googly eyes or black beads
scraps of felt
tacky glue
scissors


Take a large pompom and spread it apart a bit.  Apply some glue.


Find a good spot on your branch...stick the pompom on and give it a good squeeze.


Continue to add large pompoms everywhere you want a bunny.  The pompoms look great on the branch by themselves too....... so you don't have to make everyone a bunny if you don't want to.


Take your scraps of felt and cut out a set of ears.  I did this ahead of time for the kids.  I made the ears all one piece for easy gluing.


Apply some glue to the bottom of the ears and stick on a medium pompom.


Add 2 eyes and a teeny tiny pompom for a nose.


Then glue this head onto your large pompom.


Finally you can add another teeny tiny pompom to the back for a tail.


Give it a try and I'll see you soon from Maui!


Bead and Clay Crosses


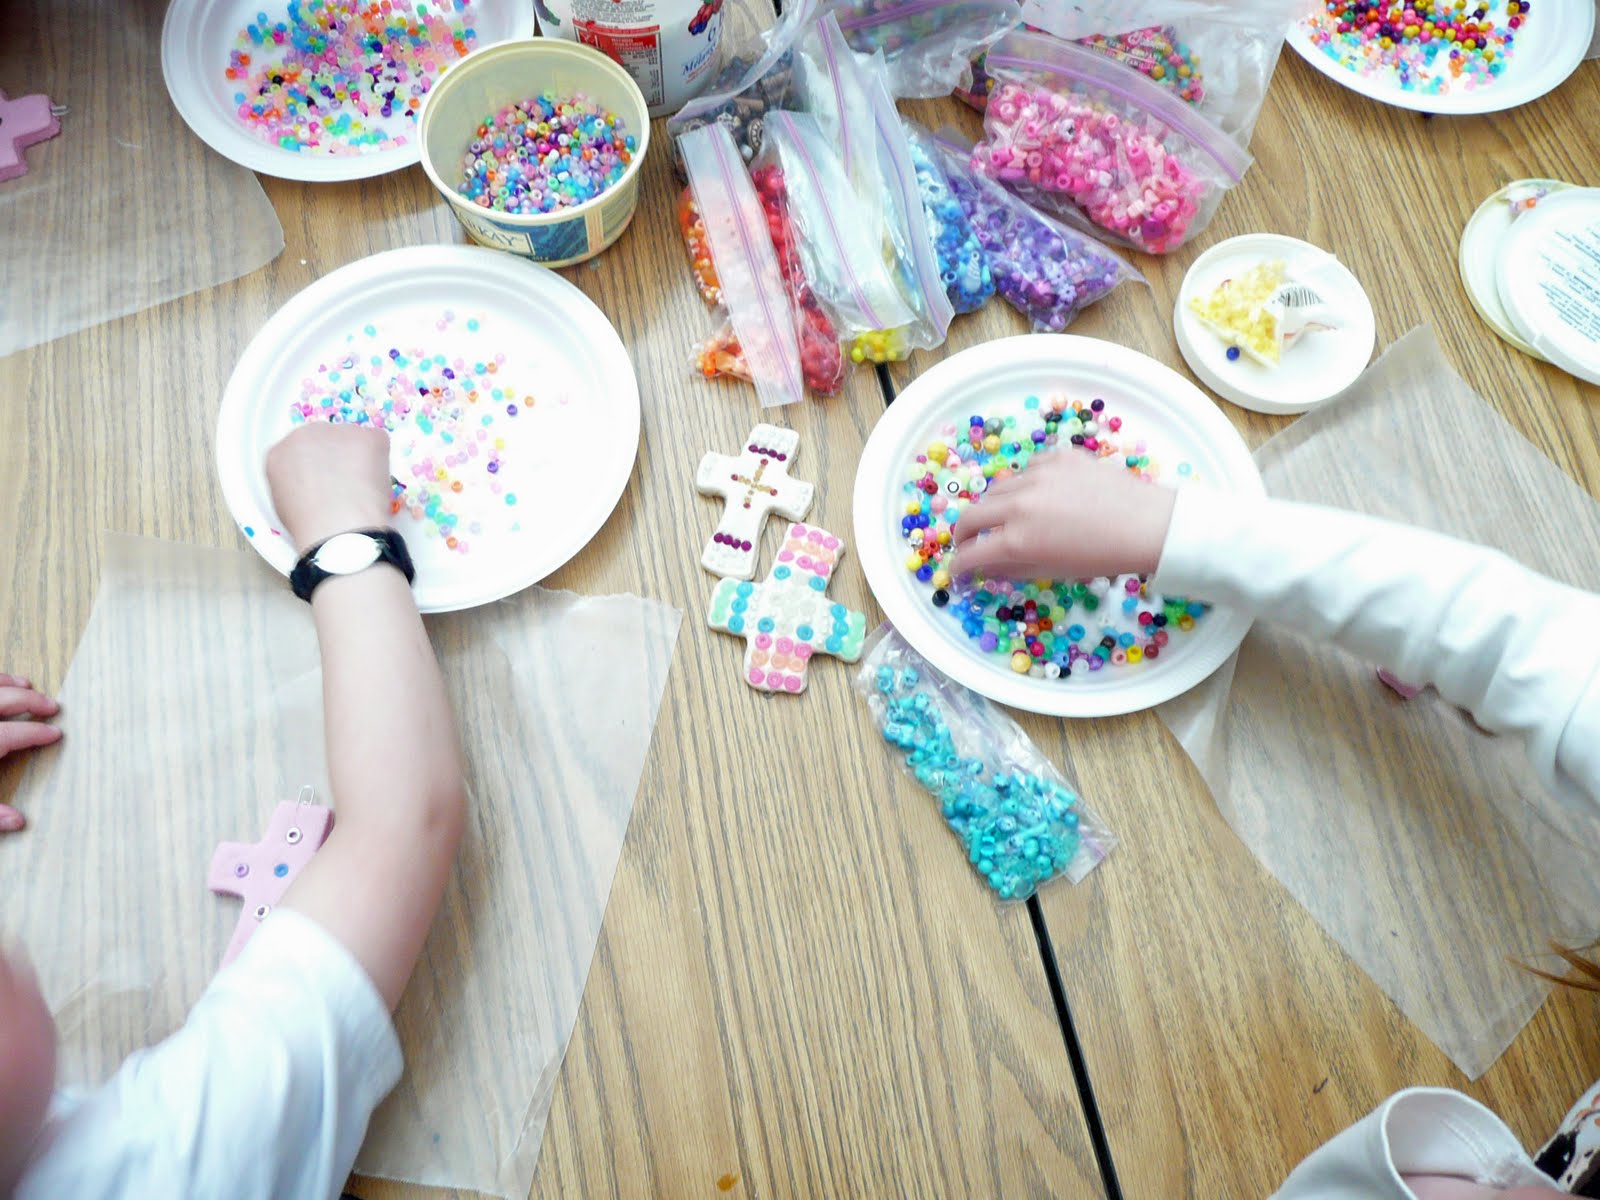
This is a project I do at Easter time with the students.  These are done by Grade 1. I also did this with Grade 4 this year using smaller beads and more complicated patterns.


Click on picture to see larger.


You need to do up a recipe of salt dough clay. ( 1 recipe is enough for 24 crosses using a 3 1/2 inch cutter)

4 cups flour
1 cup salt
2- 2 and 1/2 cups warm water

Knead into a soft dough
Store in a ziploc bag.  If not using right away you can store in the refrigerator for like forever. Just pull it out ahead of time to come to room tempertaure before using.


I like to color the dough.  Using liquid tempera or acrylic paint squirt some on the dough.


Fold over the dough.


and then knead like crazy....don't worry if it looks marbled like this it just means you have to keep kneading.


It will eventually look like this.  Even color throughout.


Roll it out and then using a cookie cutter cut out the shape.


Place a paper clip 1/2 way in at the top for hanging.

I get the kids to put a bit of water on the surface of the cross using their finger and then they can start forming their design with beads.  We use pony beads in different sizes as well as wood beads and large decorative beads.


I asked them to try and make a pattern using color or shape.


They need to push the beads in fairly firmly.


I then place them on a cookie sheet lined with parchment paper.  I write the name of the student on the paper in sharpie and then place their creation either on top or next to their name.  This allows me to keep them straight until they are baked when I can then write their names on the back in sharpie.

Bake in a 250 - 300 degree oven for about 2 - 3 hours until hard.  You don't want to overbake and have them get a brownish tinge.


When cool add a coat or 2 of Mod podge.  This will help "glue" into place any loose beads as well as add a nice shiny finish.

Keep in mind that salt dough responds to the humidity in the air.  It can sometimes feel soft even after baking and sealing.  Just let it be and it will dry out again. 


That's it.  I add a ribbon thru the paper clip at the top and the kids have a great creation to take home for Easter.


See you next time.

Happy Easter

Well I'm off for Easter vacation to the cabin and onwards to Victoria BC.

I'm taking the laptop and plan on doing a bit of painting so you still might hear from me yet!

I hope everyone has a fantastic Easter!

Here are some of the Pysanky I did this year.


Here are some done by my daughter, Allie , age 11.
If you are new to this blog and interested in Pysanky you can find my tutorial here.
take care everyone
gail

Eggs and Chicks - Easter Art


Well its been a busy week so far...Easter rush! This is a picture of what Kindergarten is taking home. It went over really well in the classroom and was remarkably easy to do. I'll give you the step by step..please excuse the messy fingers but I have dyed a ton of eggs this week and I have rainbow hands....( and my husband wonders why I never want to go for a manicure..I sacrifice my hands for my art)
The dough we are using for the chicks is salt dough. The advantages of salt dough over clay is that its cheap, its fast, and if you color the dough you skip the painting step.


These chicks were made, baked, and sealed all in the same day.


Materials Required:
salt dough (flour,salt,water)
liquid tempura paint in green, yellow, and orange
whole cloves for eyes
wax paper
garlic press (buy a cheap one in the dollar store to keep for crafting)
baking sheet
oven
sealer or modge podge (do a test on the back to make sure the sealer doesn't react to the salt in the dough...the modge podge works well)
Salt Dough Recipe
4 cups of flour
1 cup of salt
1 1/2 - 2 cups of water
Combine flour and salt. Add water to make a soft dough...if your dough is really stiff add some more water. Knead well.
1 recipe will make 10 nests.
This dough will keep indefinitely in your refrigerator. IT IS NOT MEANT TO BE EDIBLE.
You can use it for lots of different projects. Bake until hard in a 350 degree oven.

Make up your dough.

If you are going to color your dough you need to to divide it up. You need a little more than 1/2 the recipe for green, take the smaller 1/2 and take about the size of a plum to make orange, the rest will be yellow. This will color enough dough for 10 nests.
To color the dough take liquid tempura paint and knead into the dough...you have to work it a while to get the color evenly dispersed..you could also try food coloring. I was making so much I used the paint method. If your dough is getting too sticky knead in a little more flour. The color fades a bit in the oven so make your colors strong.


For each nest you will need a green lump of dough about the size of an orange, a yellow lump about the size of a plum, and a orange lump about the size of a grape.


Work on wax paper


Take your green dough and divide it into 2 balls.
Make one ball into a small bowl shape...this is the nest base.


Using the garlic press take bits from your other green ball and press them thru. Take your green strings and place along the edge of your nest.


Take your yellow lump and make 2 large balls and 2 small balls.


Put the small balls and place on top of the large ones to make your chick.


You need your whole cloves at this point. If you made the orange at Christmas you probably have some of these lying around. (good for that Easter ham as well)


Insert the cloves into the head for eyes.


Take your orange dough and make 2 beaks.
Put your chicks into the nest.


You now need to bake your nest at 350 degrees for about 2 hours. I placed mine on parchment paper on a regular cookie sheet.


After they have cooled off you can apply a coat of sealer or modge podge to get a shiny finish.


Nests waiting to go into the oven.

The second part of our Easter art was to do some eggs.
These are pastel resist. The colors are very bright.
Take a raw egg.... using oil base pastels draw some Easter designs on your egg. Bright colors work best.
Immerse in egg dye for the background color. Pat dry, don't rub as you don't want to smudge the pastel.

Here are the Pysanky done by the grade 3's. The full tutorial can be found here in an earlier post.

I think they did an absolutely awesome job!
see you next time.
gail