Tattoo
Showing posts with label spring. Show all posts

Painted Kites


Here are some kites that Grade 5 completed with Mrs. Ryan. 


They looked so great in the display case I asked if I could post them on the blog.


Now for this set of kites they used these construction bags as the fabirc for the kites.  It is similar to tarp material and did fray on the edges. 

Mrs. Ryan wanted to use house wrap like tyvec but the roll at the hardware store was too big.  If you can locate a small amount this would be a great option otherwise you might want to sew your edges or fold over and glue down to prevent the fray.


Cut a basic kite shape.  Take 2 sticks, a good cheap option is to use the natural bamboo garden stakes.  Here in Calgary I can get a pack of 24 for a $1.99.

Tape your sticks into place using hockey tape.  You can add a tail with some plastic ribbon which you can also get at the hardware store.

Tie your string on at the joint between the 2 sticks...make sure to tie them together here as well.


Turn over and paint with  acrylic paint.


Great job Grade 5!


I also thought I would include these watercolor pencil  paintings from Grade 4.


Wonderful work Grade 4!

Bunny Willows


Here is a really cute craft I'm calling "Bunny Willows".

I was at Dollaramma and they had these great packages of pastel colored pompoms, which of course I bought thinking I would come up with something.


The kids had a great time making these and I did this craft with both the Beavers troop (5-8 yr olds) and Kindergarten.


Materials Required:

a branch
large pompoms
med. pompoms
teeny tiny pompoms
tiny googly eyes or black beads
scraps of felt
tacky glue
scissors


Take a large pompom and spread it apart a bit.  Apply some glue.


Find a good spot on your branch...stick the pompom on and give it a good squeeze.


Continue to add large pompoms everywhere you want a bunny.  The pompoms look great on the branch by themselves too....... so you don't have to make everyone a bunny if you don't want to.


Take your scraps of felt and cut out a set of ears.  I did this ahead of time for the kids.  I made the ears all one piece for easy gluing.


Apply some glue to the bottom of the ears and stick on a medium pompom.


Add 2 eyes and a teeny tiny pompom for a nose.


Then glue this head onto your large pompom.


Finally you can add another teeny tiny pompom to the back for a tail.


Give it a try and I'll see you soon from Maui!


Bead and Clay Crosses


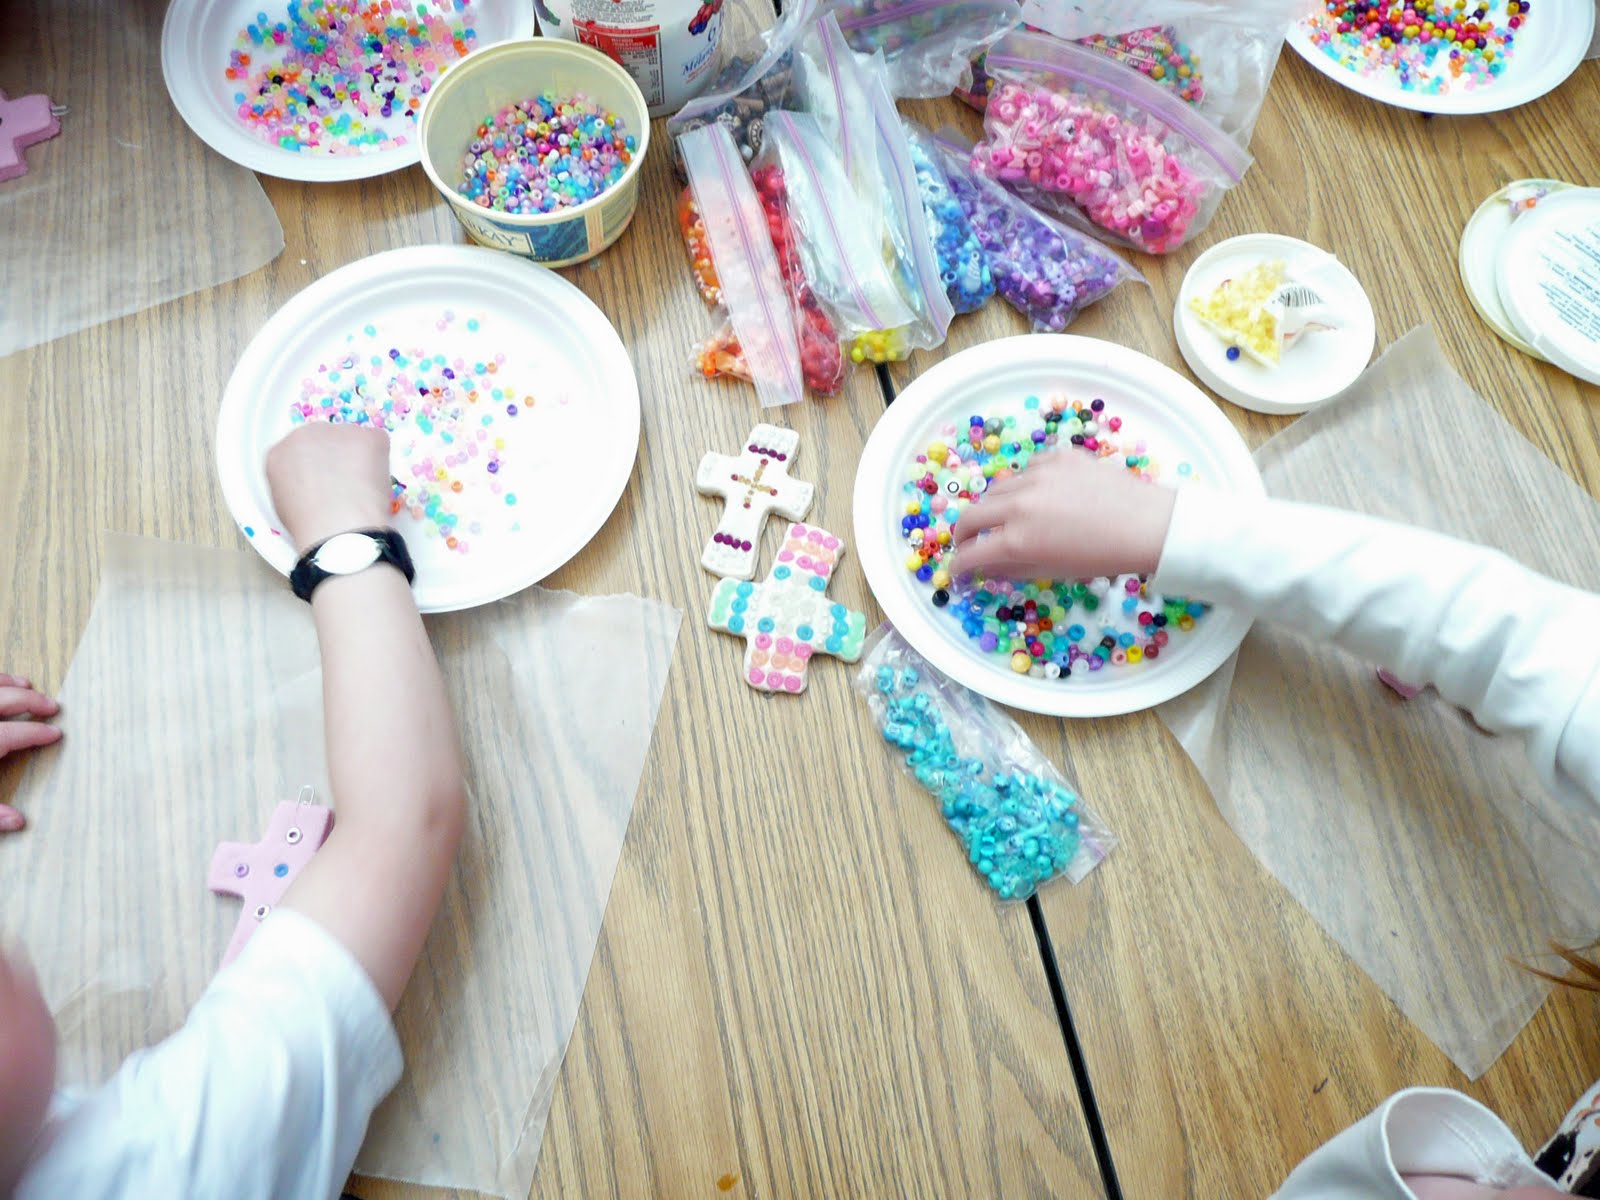
This is a project I do at Easter time with the students.  These are done by Grade 1. I also did this with Grade 4 this year using smaller beads and more complicated patterns.


Click on picture to see larger.


You need to do up a recipe of salt dough clay. ( 1 recipe is enough for 24 crosses using a 3 1/2 inch cutter)

4 cups flour
1 cup salt
2- 2 and 1/2 cups warm water

Knead into a soft dough
Store in a ziploc bag.  If not using right away you can store in the refrigerator for like forever. Just pull it out ahead of time to come to room tempertaure before using.


I like to color the dough.  Using liquid tempera or acrylic paint squirt some on the dough.


Fold over the dough.


and then knead like crazy....don't worry if it looks marbled like this it just means you have to keep kneading.


It will eventually look like this.  Even color throughout.


Roll it out and then using a cookie cutter cut out the shape.


Place a paper clip 1/2 way in at the top for hanging.

I get the kids to put a bit of water on the surface of the cross using their finger and then they can start forming their design with beads.  We use pony beads in different sizes as well as wood beads and large decorative beads.


I asked them to try and make a pattern using color or shape.


They need to push the beads in fairly firmly.


I then place them on a cookie sheet lined with parchment paper.  I write the name of the student on the paper in sharpie and then place their creation either on top or next to their name.  This allows me to keep them straight until they are baked when I can then write their names on the back in sharpie.

Bake in a 250 - 300 degree oven for about 2 - 3 hours until hard.  You don't want to overbake and have them get a brownish tinge.


When cool add a coat or 2 of Mod podge.  This will help "glue" into place any loose beads as well as add a nice shiny finish.

Keep in mind that salt dough responds to the humidity in the air.  It can sometimes feel soft even after baking and sealing.  Just let it be and it will dry out again. 


That's it.  I add a ribbon thru the paper clip at the top and the kids have a great creation to take home for Easter.


See you next time.

Woven Tree Wall Hanging


As part of Grade 1's weaving unit we will be making this Spring Tree wall hanging.  This is also a good project in the Fall using autumn colors.

As a child I remember a macrame version of these trees on a metal hoop but I could not find the instructions anywhere for the life of me so I came up with this version for the students.


Another reason why this project works well during the Spring and Fall seasons is that this is when you are pruning your trees and bushes.  You need a willow type branch, one that is flexible and will not break while "green".

Form a circular loop and tuck the ends in to hold the shape.  You want a nice 10 - 12 inch circle.


Now you could also do a nice weaving on the willow hoop like this.


For the tree I used wool roving...it works especially well at the top of the weaving where it is rounded...you then could add other materials in like bulky yarn or other natural fibers.


Now I dye my wool using kool aid or at this time of the year you can use easter egg dye.  Place the kool aid or dye in a glass jar,  add about 1 1/2 cups of boiling water, stir well, stuff your roving into the mixture and leave to cool.  Remove roving and rinse in cold water.

When you use Kool aid you'll find all the dye gets absorbed into the wool and you're left with clear water in the jar. COOL!


Tie and knot on 15 pieces of brown yarn positioned in an arc on the top of your twig hoop. You can add more if you wish just make sure you have an odd number.


I taped down my ends so they wouldn't bother me while weaving...this will be removed when finished.


Pulll the yarn pieces down and wrap around the bottom of the hoop.


Tie a knot.


And pull tight...you can always tighten this as you go if it loosens on you.


Taking a piece of roving start weaving on your hoop.


You don't have to weave all the way across...you can stop part way and just weave a section...then you can add a different color in another section.

Wool sticks well to itself when twisted...at the beginning and end of each weaving you do with the roving you want to twist the end back on itself. You can also tuck the ends into the back of your weaving as well.


Normally I would make a shuttle for the kids out of a piece of cardboard or a popsicle stick but I find with this project you just hold the roving in a ball in your hand.  With yarn you might want to use the shuttle. (I talk about making a shuttle in this post)


Continue weaving using different colors and textures if you wish.


I now want to seperate my first main branch...group 5 strands together from the middle section.


Now here I'm using brown roving but you could use brown yarn or even strips of brown felt or fabric.

Wrap around your 5 strands and tightly wind around going about 1 or 2 inches down...leave the loose tail of roving for now.


Add some more weaving in the other sections to bring them down a bit.  You are trying to make it look realistic so have one side come down farther than the other.


Wrap the branch on the one side in the same way as you did before...leave a tail....then wrap the other side.


Then wind them together bringing those 3 tails together.

See how the branches are not symmetrical...this looks more realistic.


Finally you can trim the knot ends and remove the tape.


And that's it....I'm looking forwrd to the Grade 1's versions.


We are also embroidering our names on burlap for our end of the year banners.   I just used a sharpie to write their names on the burlap and they will be doing a basic back stitch.


Here is the project Grade 5 is working on.  They are studying the Fur Trade so we are making headresses that have a beaded band and medallion.  The beads are drawn in but we are also making paper beads out of newspaper to decorate them with.  We should be finished tomorrow so I hope to have the how to and student work pictures for you soon.

We are having a bit of an art show for our Parent/Teacher interviews on Thursday night and Friday.  I hope to take some good pictures to show you next week.

Take care and I'll see you soon.